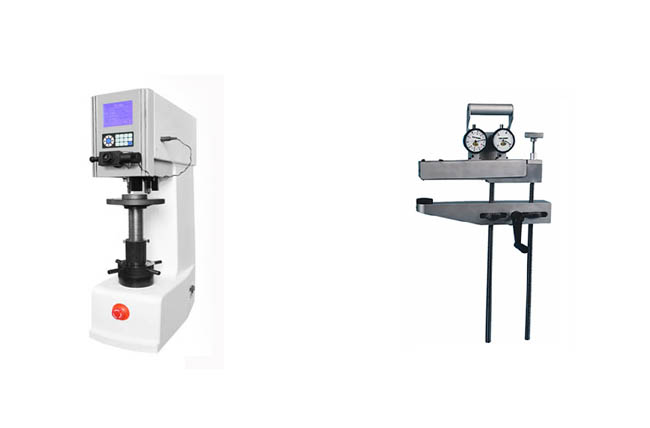
Digital Hardness Testers vs Analog Hardness Testers
Hardness testing materials such as metals and alloys are essential to quality control and production of everything from steel constructions, oil and gas, automotive, etc. In order to conduct these hardness tests, the company or lab needs a hardness tester to perform the test. Now, in an age where we are all digitally connected, using this computer or that input system, you could be forgiven if you thought all hardness testers have gone digital. However, that is not the case. There are plenty of engineers and test operators that use analog hardness testers and would rather stay using one because that is what they have known for years. Here at METSUCO, where we are a leading supplier of affordable hardness testers, we supply both digital and analog hardness testers. That is why we want to look at digital hardness testers vs analog hardness testers and see which one is the best to use for you.
Analog Hardness Testers
The Rockwell analog hardness testers date back to 1919. The early model of the Rockwell tester had a sturdy, hollow cast frame. The head consisted of a precise measuring dial and a plunger that held the indenter. A series of levers with a knife edge connected the plunger with a weight. This weight, originally called the “final weight” (now known as the major load), was applied and released by a hand lever. What this quick little history lesson shows is that analog hardness testers have been around longer than any engineer using them today. That is also why companies like Phase II and King are still manufacturing analog hardness testers today. There are plenty of end users who started their careers before digital hardness testers were readily available. And if you are used to doing something a certain way for so many years, you get quicker at it. Being able to keep up with the daunting pace of manufacturing is crucial these days.
Another reason analog hardness testers are still around and used is cost. Analog hardness testers are just plain less expensive than their digital counterparts. So, if you have an operator that has been around for 20 years and a department on a tight budget, then analog might be the way to go.
Digital Hardness Testers
Let’s get one thing out of the way, yes digital hardness testers are more expensive than their analog counterparts. However, there are reasons for this. Engineering and testing is a form of science. Science requires repeatable results. With digital hardness testers, the process has become more and more automated. That automation leads to both repeatability and reproducibility of single hardness indents. Now that includes the introduction of the automated placement of hardness indents. “This was initially driven by particular applications, such as surface heat treatment of gears, where a combination of a hard surface layer and a soft interior structure allows the gear components to withstand resist wear as well as high stress and fatigue in service” (Quality Mag)
Now, we have covered some of the advantages of digital hardness testers in our piece, Benefits of Digital Hardness Testers. To sum up what was covered there, with a digital hardness tester you can get:
- The ability to mount a camera and take “shots” of the results
- Digital readouts
- Ability to print those readouts
- Higher accuracy of measurement
- The ability to program and automate the test and results calculations
- Reduced possibility of human error
The one thing we feel that did not get enough emphasis in that piece was that with digital hardness testers, they are making advancements all the time. Some of these advancements come in the form of the software used to drive and produce data from the hardness tester. As stated in Quality Mag in 2021 “It’s now possible to ‘scan’ a sample and create a collage of indents to provide a wealth of detail on material hardness variation. The hardness map created literally adds a new dimension to any test data, providing a quick qualitative assessment of the heat treatment process, with the detailed quantitative data available if closer inspection is needed.” It is noted that while this level of information may not be needed for quality control, for product and development this is invaluable data. Another area automation baked into the software is helping quality control of welding joints. For welds, quality control involves placing short lines of indents in specific areas across the weld, to identify process problems. Before, software could help operators in guiding them to where to set those indents. However, this leads to possible “missed spots” that should have been tested. Now, the software can use the camera to scan the weld and create an automated mapping of the entire weld area. This gives two major benefits. One, it can reduce the possibility of missed spots that should have been tested. Two, it can actually reduce the amount of time an operator needs to set up tests.
These advancements lead to the ability to analyze sample characteristics in the measurements and materials tested in ways that were not available just a few years ago. This leads to improved quality both on the development side and quality control side of production and manufacturing. So, while yes, digital hardness testers do require more investment, in both time and learning the software, if you are looking for more accurate, repeatable data that helps drive decisions that affect cost and manufacturing many more times the cost of the hardness tester, digital hardness testers should be the way you go.
We hope this provided some insight into both digital and analog hardness testers. METSUCO has been a leading provider of hardness testers for over 30 years. We can answer any questions you have on either digital hardness testers or analog hardness testers, both before and even after a purchase of one. Call 713-827-0700 or email sales@metsuco.com with inquiries.

